Photo by
 In a previous post, I wrote about using GitHub Actions to automate the promotion of my blog posts. While the GitHub Action works, the approach lacks any sense of state and tracking. The tweets that promote my posts are random, and that can create an uneven marketing approach.
I want to give Azure Functions a try, along with the Azure Toolkit for Rider. In this post, we’ll see how we can use JetBrains Rider to do local Azure Functions development with JetBrains Rider. We’ll also cover one of the most significant issues for macOS developers and how to overcome the problem.
Azure Toolkit for JetBrains Rider
Let’s assume we already have the latest version of JetBrains Rider installed on our development machine. If not, do it now!
The first step is to install the Azure Toolkit for Rider. From the Welcome To JetBrains Rider dialog, we need to click ⚙ Configure | Plugins, which will bring up the plugins search dialog.
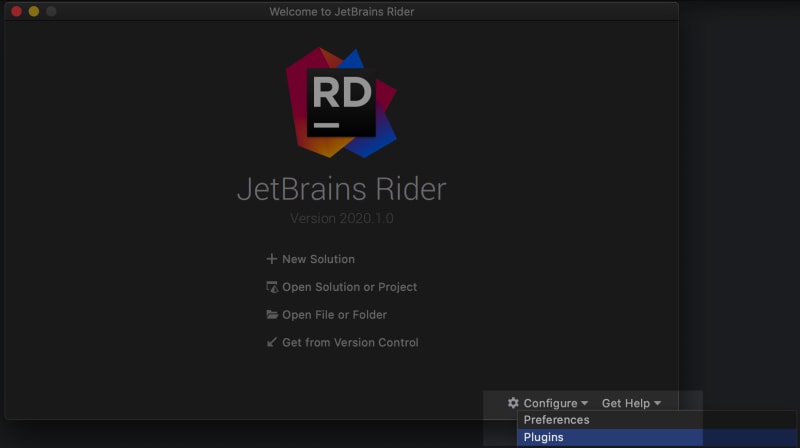
In the Plugins dialog, we’ll need to search for “Azure Toolkit,” which will show us the result for Azure Toolkit for Rider. Install the plugin.

Once we install the plugin, we’ll need to install the Azure Functions Core Tools. Rider makes this easy. Back on the Welcome To JetBrains Rider dialog, we can click ⚙ Configure | Preferences. In the Preferences dialog, we can find the settings for Azure Functions under Tools > Azure > Functions.
In the settings for Azure Functions, we’ll need to set the Azure Functions Core Tools path. If you don’t have the tools already installed, Rider will download and install the tools for you.

We should be ready to start programming our first Azure Function using Rider. Running the function is a different story entirely.
Azurite - Azure Storage Emulator
Azure Functions support multiple trigger types:
- Queue
- Timer
- Event Grid
- HTTP
Every trigger except for HTTP requires a storage mechanism. That storage mechanism is Azure Blob Storage. We could use an Azure Blob Storage instance in the cloud, but that would be costly and would force us to be online during all of our development.
Instead, we are going to use Azurite and Docker to run a local emulator that runs on macOS. You will need to install Docker Desktop.. It is highly recommended we use docker-compose for this, as it ensures we have one instance of the storage emulator.
In a file named docker-compose.yml, copy and paste the following YAML.
version: '3.4'

services:
  azurite:
    image: "mcr.microsoft.com/azure-storage/azurite"
    container_name: "azurite"
    hostname: "azurite"
    restart: always
    ports:
      - 10000:10000
      - 10001:10001
Once saved, we need to run the following command from the same directory as the saved docker-compose.yml file.
$> docker-compose up -d
The command will download the latest version of Azurite and run the container in the background. We can see that in the Docker Desktop dashboard.

Our First Azure Functions
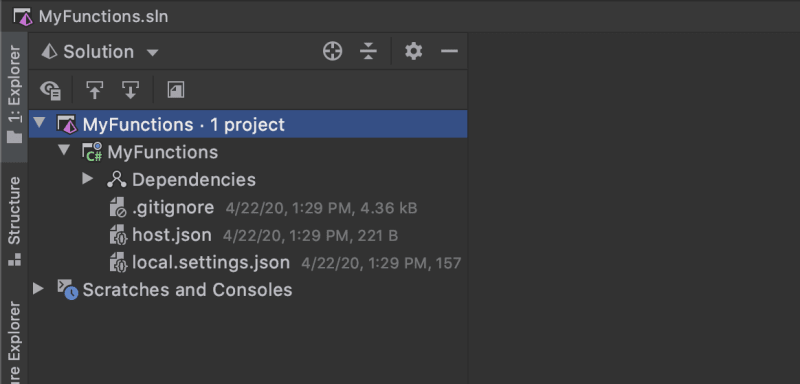
Now that we have our environment set up, we are ready to write some Azure Functions. We can start by creating a New Solution and selecting the Azure Functions template found in the left pane.

If we’ve never created an Azure Functions project, the result may be a little confusing. It’s an empty solution.
We need to right-click the project and select a function type. In this example, we’ll choose Add > Timer Trigger.

We need to give our new function a name. Let’s call it Test. We should have a new function in our project.
using System;
using System.Threading.Tasks;
using Microsoft.Azure.WebJobs;
using Microsoft.Azure.WebJobs.Host;
using Microsoft.Extensions.Logging;

namespace MyFunctions
{
    public static class Test
    {
        [FunctionName("Test")]
        public static async Task RunAsync([TimerTrigger("0 */5 * * * *")] TimerInfo myTimer, ILogger log)
        {
            log.LogInformation($"C# Timer trigger function executed at: {DateTime.UtcNow}");

        }
    }
}
We’ll see that our function has an Azure Functions lightning bolt in the left-hand gutter. We can use this to trigger our function.

Before we run the function, let’s change the timer to run every five seconds by changing the CRON expression to */5 * * * * *. The change in the interval will make it easier to see our function working. Running the function, we can now see the results in our run window.

WARNING: macOS users, if you are seeing "The listener for function 'Test' was unable to start." then you are likely not running the storage emulator. Follow the storage emulator install steps above. Azurite also works for Windows and Linux users.
JetBrains Rider Loves Azure Functions
Some other features Azure Function developers will appreciate can be found in the lightning bolt beside the function.

The first feature is debugging. The IDE can debug our functions as if they were any other .NET application.

An impressive feature is the Trigger creator, which will generate an HTTP scratch file for any specific function. The scratch file is especially helpful in triggering code without the need to have a queue item, time, or other dependency trigger our function.
# Trigger Azure Function - Test
#
# More information can be found in the Azure Functions documentation,
# as well as examples on how to pass test data to a function:
# https://docs.microsoft.com/en-us/azure/azure-functions/functions-run-local#passing-test-data-to-a-function
#
# Make sure to update the below calls to suit your function host and port.
#
# Call the following endpoint to locally run HTTP and webhook-triggered functions:

GET http://localhost:7071/api/Test

###

# Call the following administrative endpoint to trigger non-HTTP functions:

POST http://localhost:7071/admin/functions/Test
Content-Type: application/json

{}
From the new scratch window, we can trigger each HTTP request.

We’ll see the following console output after running the function via the admin endpoint.
[04/22/2020 18:15:31] Executing 'Test' (Reason='This function was programmatically called via the host APIs.', Id=6b9543f7-5dba-4703-b327-cd02db89b765)[04/22/2020 18:15:31]   "status": 202,
[04/22/2020 18:15:31]   "duration": 405
[04/22/2020 18:15:31] }
Finally, Rider can deploy our Azure Function to our Azure accounts. By right-clicking our project, we can choose to Publish.

Cool right?!
Conclusion
Azure Functions can work on all platforms, but for macOS users, we’ll need to take a few additional steps. Without the Azure Storage emulator, we’d be forced to do all of our development against a cloud instance of blob storage. By utilizing Azurite, we can continue to do all of our dev work locally while having all the features of Azure Functions. Using JetBrains Rider can also make the experience better with tool installation, running, debugging, and publishing.
I hope you found this post enlightening, and please leave a comment.