 Photo by
 The marriage of .NET Core and static site generators is a beautiful thing. There are many great static site generator options out there like 11ty, Jekyll, Hugo, and many more. While you can accomplish amazing feats at build time, a dynamic backend can allow your application features that are not possible at build time. The combination of .NET Core and the static site generator of your choice is a powerful one-two punch. In this post, I’ll show you how to set up an ASP.NET Core application hosting a static site generator, with the added ability to watch all files within your project.
Project and Static Site Setup
In this post, I’ll be using 11ty as my static site generator. You could adapt this post to any other static site framework. To get started with 11ty, check out the documentation site. The first step is to create a new ASP.NET Core application. From a command line, let’s create a new app.
$> mkdir staticz
$> cd staticz
$> dotnet new web
When we run this, we should have an empty ASP.NET Core applications.
The command dotnet new web will create an empty ASP.NET Core web application. Next, let’s run the commands to install 11ty.
$> npm init
$> npm install @11ty/eleventy --save-dev
To be able to run 11ty from the node_modules folder, we need to add an NPM script in packages.json.
{
  "name": "staticz",
  "version": "1.0.0",
  "description": "",
  "main": "index.js",
  "scripts": {
    "test": "echo \"Error: no test specified\" && exit 1",
    "build": "eleventy --input=. --output=wwwroot"
  },
  "author": "",
  "license": "ISC",
  "devDependencies": {
    "@11ty/eleventy": "^0.10.0"
  }
}
We are passing some default arguments to 11ty. First, the directory to build, and secondly, the output directory of wwwroot. The output directory is the default content directory ASP.NET Core looks for in web projects. Before we run the script, let’s add an index.html file to the root of our project.
<!DOCTYPE html>
<html>
  <head>
    <title>Hello, World!</title>
  </head>
  <body>
    <p>Hi</p>
  </body>
</html>
Let’s make sure our script works by running npm run build in the command line. You should see some build output, and a brand new wwwroot folder. Awesome! Let’s get to the ASP.NET Core part now.
ASP.NET Core Configuration
The ASP.NET Core application has three parts: Add some static file middleware, modify our csproj file, and add a new build target. I’ve mentioned one of the approaches in a [previous blog post about kicking some butt with Parcel.
Let’s first look at our changes to the Startup class. We need to register a few middleware components, specifically the DefaultFile middleware and the StaticFile middleware.
using Microsoft.AspNetCore.Builder;
using Microsoft.AspNetCore.Hosting;
using Microsoft.Extensions.DependencyInjection;
using Microsoft.Extensions.Hosting;

namespace staticz
{
    public class Startup
    {
        // This method gets called by the runtime. Use this method to add services to the container.
        // For more information on how to configure your application, visit https://go.microsoft.com/fwlink/?LinkID=398940
        public void ConfigureServices(IServiceCollection services)
        {
        }

        // This method gets called by the runtime. Use this method to configure the HTTP request pipeline.
        public void Configure(IApplicationBuilder app, IWebHostEnvironment env)
        {
            if (env.IsDevelopment())
            {
                app.UseDeveloperExceptionPage();
            }

            app.UseHttpsRedirection();
            app.UseDefaultFiles();
            app.UseStaticFiles();
        }
    }
}
The UseDefaultFiles registration must be called before the UseStaticFiles call. I also threw in the call to UseHttpsRedirection for good-practices reasons. The next step is to tell our application to run the npm run build command we have in packages.json. We do this by modifying our .csproj file.
<Project Sdk="Microsoft.NET.Sdk.Web">

  <PropertyGroup>
    <TargetFramework>netcoreapp3.1</TargetFramework>
  </PropertyGroup>

  <Target Name="Static" BeforeTargets="Build">
    <Exec Command="npm run build" />
  </Target>

  <ItemGroup>
    <!-- extends watching group to include *.js files -->
    <Watch
      Include="**\*.cs;**\*.js;**\*.json;**\*.html;**.*.md"
      Exclude="node_modules\**\*;wwwroot\**\*;"
    />
</ItemGroup>

</Project>
There are two essential elements to this project that you should take note of:
- The build target of
Static. It will run our NPM script. - The
Watchelement tells thedotnet-watchcommand to observe specific files. You can also exclude certain directories as well.
Cool! Now we have all the pieces, and only one thing left to do.
Dotnet Watch All The Things
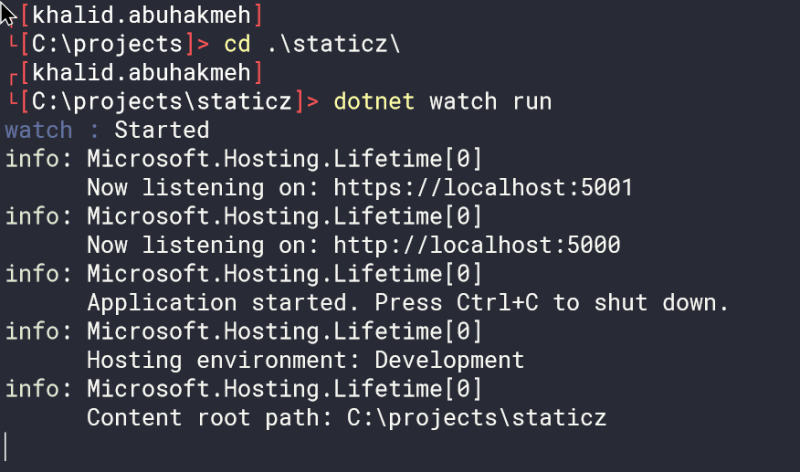
In the command line, type the following command.
$> dotnet watch run
The watch command will use your current project and the configuration options we have in our project file. Here is my command output.
Great! When we visit https://localhost:5001, we see the output of our index.html file.

Now, let’s modify our index.html file from saying Hi to a hipper Yo!.

As soon as the change occurs, our process is shut down and restarted. Since we modified the project to execute our NPM script, we also build our web assets. Going back to https://localhost:5001 we see the results of our hard work.

Yes! Now we have a quick feedback loop that includes our ASP.NET Core work and our static site work. If you want to configure dotnet-watch more granularly, I recommend reading the Microsoft Documentation site for more detailed information around modifying your project.
Conclusion
We have many tools at our disposal, and I think the combination of static site generators and ASP.NET Core are a winning combination. If you work within a multi-disciplinary team, this approach also allows everyone to participate in building your web application. Copywriters can focus on writing content, and developers can focus on optimizing the application using C# and .NET. Remember, this approach can be modified to work with your favorite static site generators, so branch out and experiment. All in all, this is a winning recipe in my book.


