macOS is my operating system of choice, but oddly I do most of my professional programming with the .NET Framework. Historically, the choice of Macs paired with .NET would raise eyebrows, but not anymore. The release of .NET Core has made the .NET ecosystem more welcoming of folks with other operating systems.
It’s undeniable that Xamarin helped pave the way for technological diversity in the .NET space. While we’re reaping the benefits now, the idea of developing native macOS applications has never really piqued my interest until now.
In this post, we’ll be following Microsoft’s guide to building a Hello, Mac native mac application using Xamarin.Mac tweaked for JetBrains Rider.
Why Use Xamarin.Mac
There are multiple cross-platform frameworks for building native applications: Xamarin.Forms, Uno Platform, Electron, and more. So why choose Xamarin.Mac?
Xamarin.Mac gives us the ability to write truly native apps for macOS. We get to use macOS’ buttons, labels, windows, and the entire UI toolkit. It’s an ideal choice for folks looking to target macOS only. Native macOS components fulfill the needs of our UI, while we can lean on the power of the .NET Framework to handle backend functionality.
macOS applications utilize the Model-View-Controller pattern, which makes it possible for other technologies to step into the backend role. In this demo, we’ll be using C#.
Getting Started
Before we get started writing the demo, we’ll need all of our dependencies installed.
- XCode
- Xamarin iOS & Mac
- Mono
We can download XCode from the Apple AppStore. Installation of the other two dependencies can happen from inside of JetBrains Rider. In the Preferences window, we can select Environment and select Mono and Xamarin iOS & Mac.
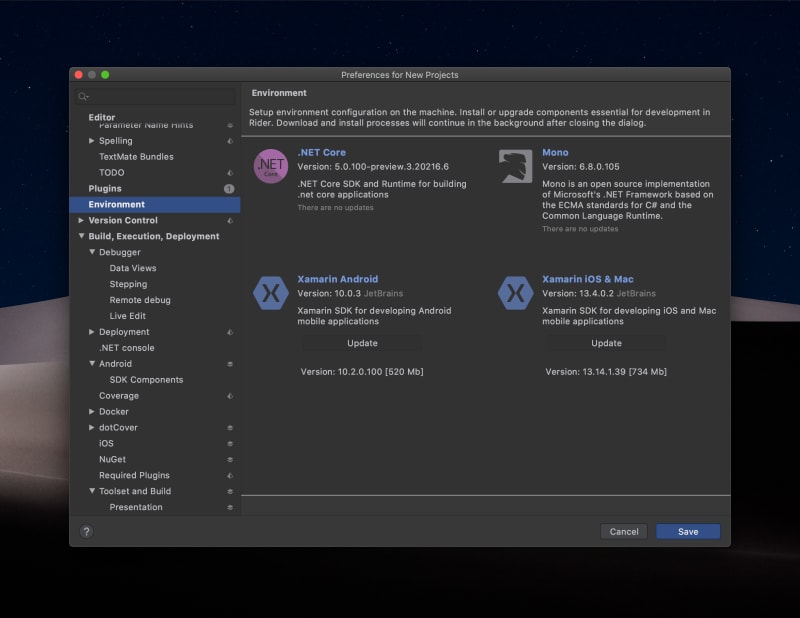
Warning to the uninitiated, installing XCode is going to take a while. Now is a good time to get a snack, hug loved ones, and pet the family dog.
Hello Demo
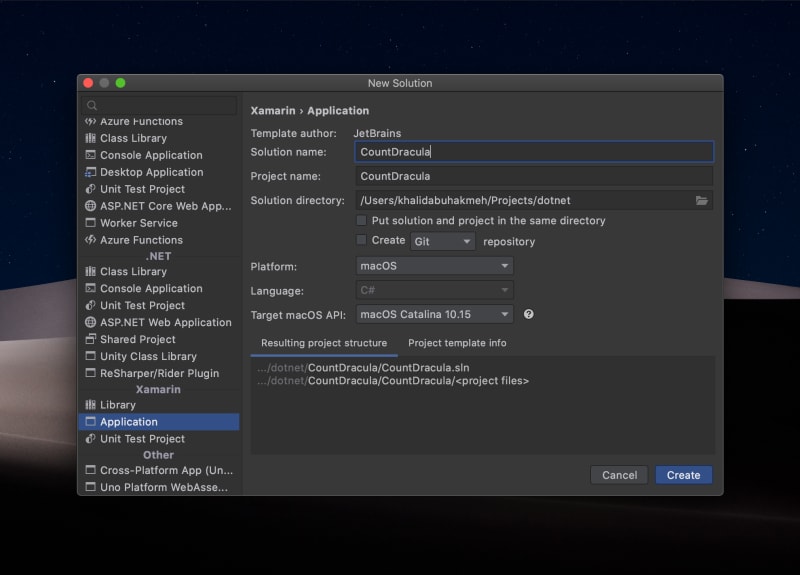
From the JetBrains Rider welcome dialog, we start by locating the Xamarin category on the left. From there, the dialog updates allowing us to choose the Platform. In our case, we want to target macOS. For the sake of this demo, the Target macOS API is irrelevant, but we can pick one that sparks joy. We can not create the project.
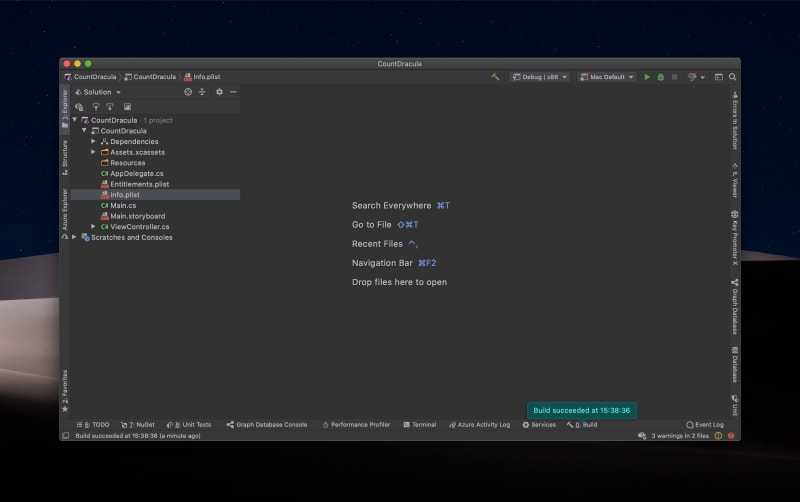
Noticing the layout of our project, we see a few native macOS files mixed with C# files. In this demo, we’ll be focusing primarily on ViewController as it will hold our logic.
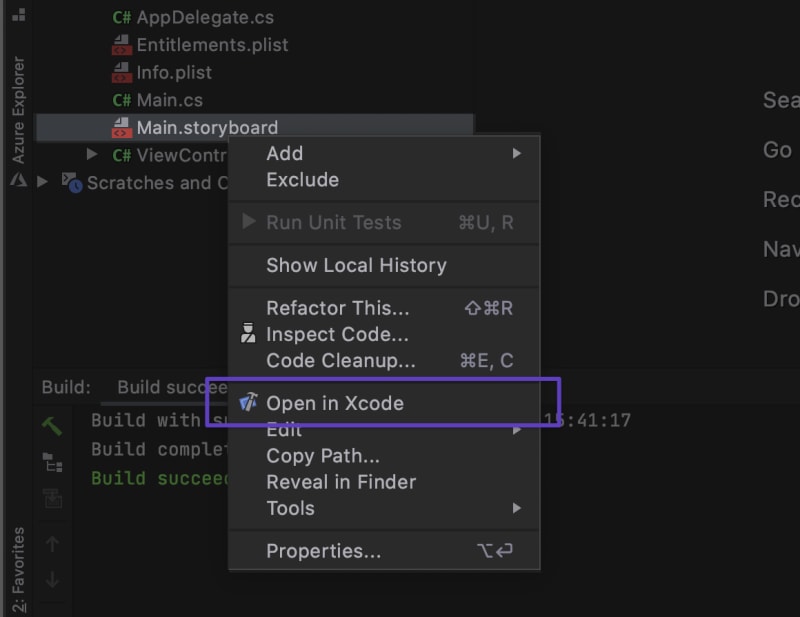
Before we can start writing any C# code, we need to create outlets on our controller so that the UI can communicate with the backend. We can do this by right-clicking the Main.storyboard file and selecting Open in XCode.
With XCode open, we can change some settings. Let’s add a few controls and link them back to our controller. To open the library, we’ll use the shortcut Shift+Command+L (⇧⌘L).
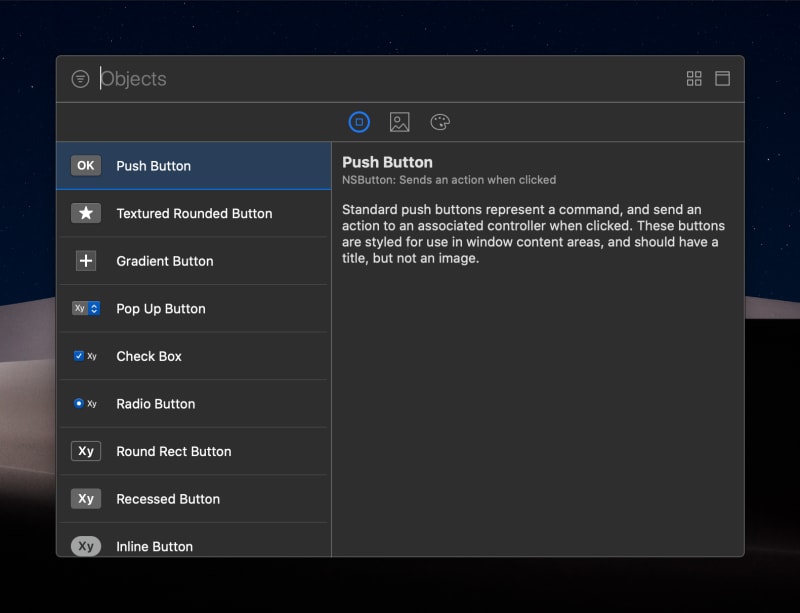
From here, we can drag a Push Button and a Label to our view. We can play with the layout settings for each control, but it is unnecessary for this tutorial. We could spend forever making the UI “perfect”.

From here, let’s create a few outlets. From XCode, we need to open the ViewController.h file, which holds our ViewController interface. We’ll want to have two editors side-by-side, we can create the layout by clicking a button in the top right of our current editor. We’ll highlight the button below in a purple box.
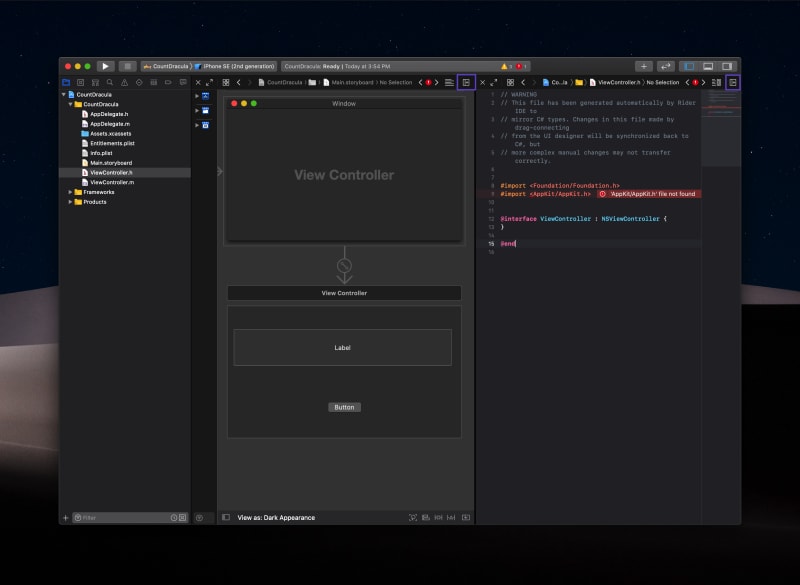
The next step is where the magic happens. We will create the outlets in our ViewController. Holding down the Ctrl (⌃) key, we’ll click the button and drag it right below the close } and between @end.
We want to choose Action from the Connection dropdown and give the Action a name. In this case, we give it the name of ClickedButton. We also want the Type to be NSButton.
Next, let’s add the label to our ViewController. Holding Ctrl (⌃), we need to drag an outlet in between the {} of ViewController. We should see an Insert Outlet label. We can now give our new outlet a name, in this instance, we can use CountLabel. If its unclear, please watch the video below.

Our ViewController.h file should now contain the following code.
We can save the file now and go back to Rider. When we look at ViewController.Designer.cs we’ll notice that Rider generated the outlets necessary to interact with our macOS UI.
We’ll need to add the following code to our ViewController class.
When we run the application, we can increment the counter by clicking the button.

Hooray! We have our first native macOS application. If your clicks aren’t going through, be sure that the connection between the button and the ViewController is active in XCode. You can do this by right-clicking the button in XCode.

Conclusion
I love macOS but never thought of writing any apps for it, which seems like an oversight on my part. Using JetBrains Rider, we can use our favorite IDE while developing apps for our operating system of choice. With Xamarin.Mac we get a native app experience with the ability to use .NET to handle the backend. We also get to use native .NET debugging tools to diagnose issues.
I hope you found this tutorial helpful. Please leave a comment below if you have any questions.

 Photo by


