 Photo by
 I’ve recently been on an HTMX journey, trying to learn more about the library and slowly combining it with my expert-level knowledge of ASP.NET Core. What I’ve found along the way is that using HTMX is a powerful tool that can fully take advantage of all the strengths that ASP.NET Core’s Razor view engine can offer. But, like most tools in tech, it often feels like there are a million ways to solve any problem.
In this post, let’s build a color randomizing tool that could be solved using three approaches in HTMX: the usual way, out of band swaps, and event triggers.
Note: We’re using HTMX.NET NuGet packages to leverage ASP.NET Core’s link generation. Optional, but very helpful.
The Usual HTMX Way
The usual implementations of an HTMX interaction involve you, the user, clicking elements on an HTML page to trigger requests to the server. Upon receiving the request, the server performs its operations and responds with a complete HTML fragment. When HTMX sees the response, it replaces an element within the existing page with the received HTML element. This approach is the typical way you would work with HTMX where one interaction results in the replacement of one piece.
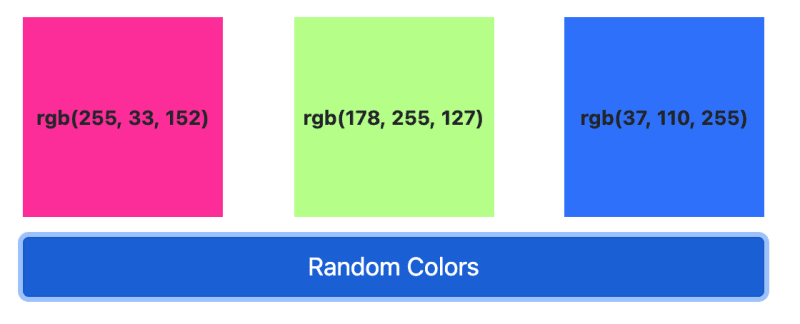
Let’s take a look at our UI, which includes three colored boxes and a button. When you click the button, HTMX replaces the entire collection of colors at once.
This approach is ideal for self-contained and straightforward interactions. First, let’s look at the HTMX attributes.
<div class="row mb-4">
    <div class="col-12">
        <h2>Normal</h2>
        <hr/>
        <div id="random" class="d-flex justify-content-between">
            @await Html.PartialAsync("Shared/Normal")
        </div>
        <div class="mt-3">
            <button hx-get
                    hx-page="Index"
                    hx-target="#random"
                    class="btn btn-primary btn-lg w-100">
                Random Colors
            </button>
        </div>
    </div>
</div>
We’ve segmented the colors into their partial view named Normal.
<div>
    @await Html.PartialAsync("Color", Color.Random(Color.Red))
</div>
<div>
    @await Html.PartialAsync("Color", Color.Random(Color.Green))
</div>
<div>
    @await Html.PartialAsync("Color", Color.Random(Color.Blue))
</div>
We can see from our HTMX definition that this partial response will replace the innerHTML of the random element.
Let’s take a look at the out of band swaps next, as it can be helpful when elements are logically disconnected.
HTMX Out Of Band Swaps With ASP.NET Core
Imagine that each colored box is a separate unique element on the UI. The application knows these elements have
consistent identifiers regardless of how often the application refreshes data. When the application has deterministic
HTML ids, you can utilize HTMX’s out of band swaps to replace elements by piggy-backing elements in the response
along with the hx-swap-oob attribute.
First, let’s look at the HTMX attribute implementation. The server will only return out of band elements. The default
behavior of HTMX is to replace the triggering element with the remaining content. Since the payload won’t have any
remaining pieces, you can target an empty HTML element. In this case, you can target #oblivion, which is effectively a
no-op.
<div class="row mb-4">
    <div class="col-12">
        <h2>Out Of Band</h2>
        <hr/>
        <div class="d-flex justify-content-between">
            @await Html.PartialAsync("Shared/OutOfBandColors")
        </div>
        <div class="mt-3">
            <button hx-get
                    hx-page="Index"
                    hx-page-handler="OutOfBand"
                    hx-target="#oblivion"
                    class="btn btn-primary btn-lg w-100">
                Random Colors
            </button>
        </div>
        <div id="oblivion"></div>
    </div>
</div>
Next, let’s look at the fragment returned by ASP.NET Core.
<div id="red" hx-swap-oob="true">
    @await Html.PartialAsync("Color", Color.Random(Color.Red))
</div>
<div id="green" hx-swap-oob="true">
    @await Html.PartialAsync("Color", Color.Random(Color.Green))
</div>
<div id="blue" hx-swap-oob="true">
    @await Html.PartialAsync("Color", Color.Random(Color.Blue))
</div>
You’ll notice that the fragments differ from the first sections response by three crucial factors:
- There are
idattributes on all elements. HTMX will use these to replace matching HTML elements on the page. That means you can place the original elements can anywhere in the DOM. - Each element is decorated with the
hx-swap-oobattribute. - There is no additional HTML outside of the elements.
The drawback to this approach is you might have several desperate HTML elements that you need to combine into the final result. Frustratingly, combining elements may cause an architectural challenge, which brings us to our final approach.
Document Triggers
The final approach utilizes Hyperscript, but you could accomplish the same with some basic JavaScript. The idea is to have our HTMX elements listen for document-level events. When you trigger the event, the HTMX elements will request updated information from the server. Let’s take a look at the implementation.
<div class="row">
    <div class="col-12">
        <h2>Trigger HTMX</h2>
        <hr/>
        <div class="d-flex justify-content-between">
            <div hx-get hx-page="Index" hx-page-handler="Color" hx-route-color="red" hx-trigger="colors from:document">
                @await Html.PartialAsync("Color", Color.Random(Color.Red))
            </div>
            <div hx-get hx-page="Index" hx-page-handler="Color" hx-route-color="green"
                 hx-trigger="colors from:document">
                @await Html.PartialAsync("Color", Color.Random(Color.Green))
            </div>
            <div hx-get hx-page="Index" hx-page-handler="Color" hx-route-color="blue" hx-trigger="colors from:document">
                @await Html.PartialAsync("Color", Color.Random(Color.Blue))
            </div>
        </div>
        <div class="mt-3">
            <button
                    id="randomize"
                    _="on click trigger colors"
                    class="btn btn-primary btn-lg w-100">
                Random Colors
            </button>
        </div>
    </div>
</div>
There are two essential parts to this implementation:
- The
hx-trigger="colors from:document"on all the elements that should refresh after you fire thecolorsevent. We are listening for the event on thedocument. - When you click the button, you will trigger the
colorsevent. We register the event using Hyperscript:_="on click trigger colors".
This approach has advantages in that you can keep your server implementation more separated, cache potential responses, and have an opportunity to trigger events from other interactions. The disadvantage to this approach is that you’ve made three separate requests to the server for every event. Remember, the chattiness of this approach will depend on your implementation. You can refactor responses and refreshes into smaller or more significant portions of your user interface.
Conclusion
HTMX is a very flexible tool, and as you build more complex user interfaces, you’ll need to use more of its features. However, I love the options it offers, and as you’ve seen in this post, the possibilities are endless yet still easy to understand. If you’re interested in seeing this solution in its final implementation, go to the GitHub repository below. As always, thanks for reading.
GitHub Repository for HTMX Swapping Techniques
Also, feel free to follow me on Twitter @buhakmeh to talk more about #aspnetcore and #htmx.


